Saturday, November 12, 2011

My cheesy birthday

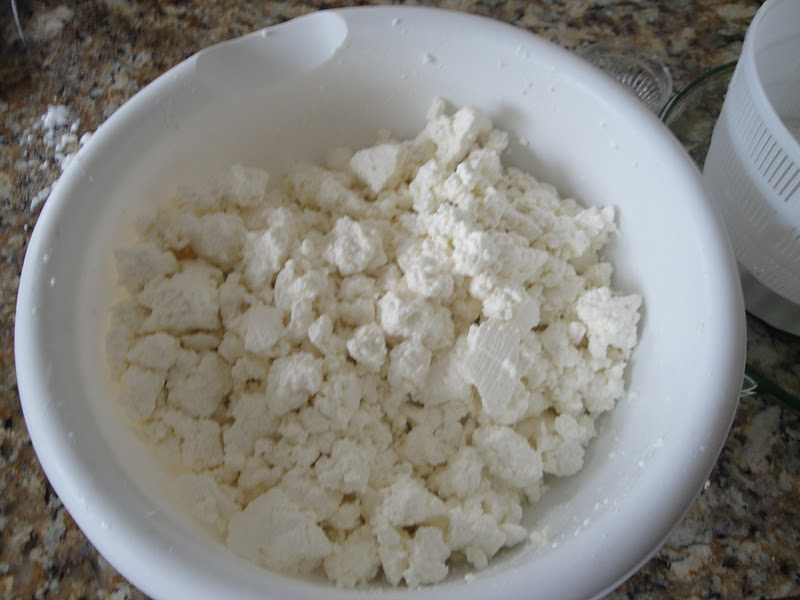
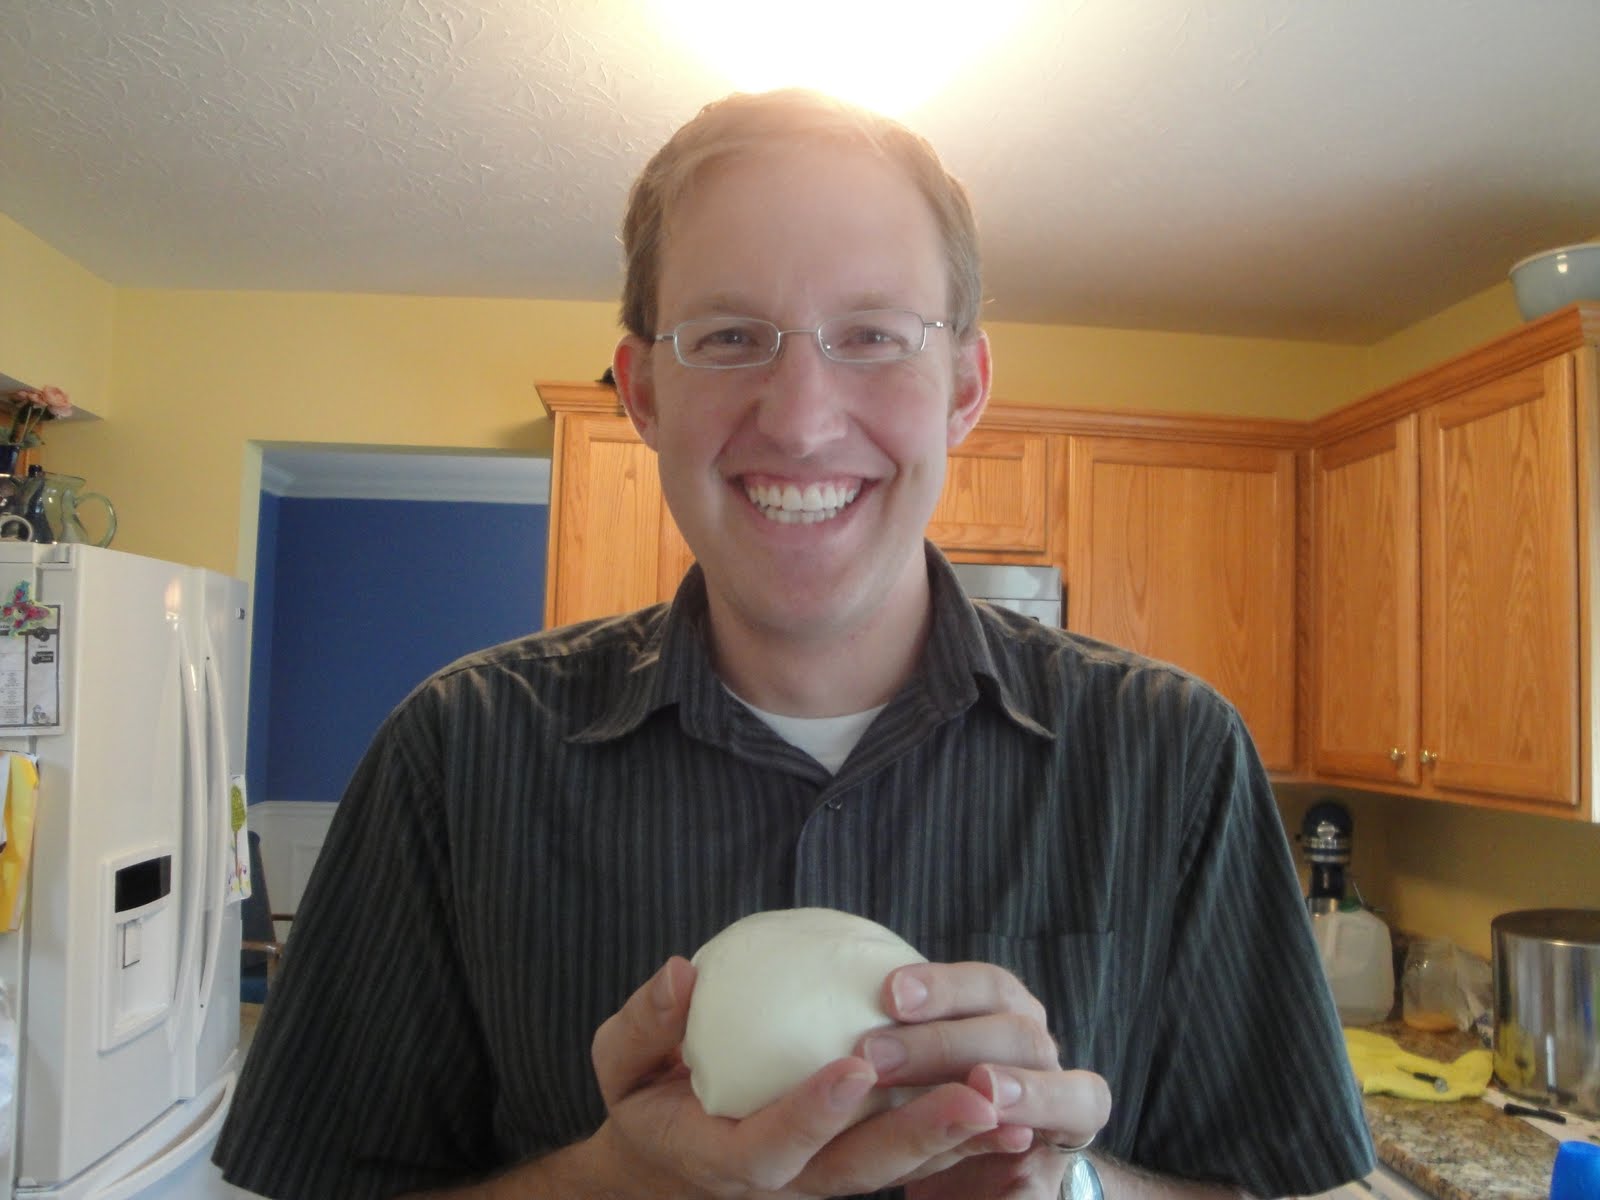
So it's been a while since I have wrote in the blog.  But that doesn't mean I have stopped making cheese or not much has happened.  First I had my birthday and I got a lot of good stuff for my birthday to help my my cheese making hobby. 


So for my birthday I got many good things.  I will try to describe them starting from the lower left hand corner.  First I have a new cheese book that I am really enjoying.  It is called Artisan Cheese Making at Home by Mary Karlin  it is a great book that it a little more intermediate but has a lot of good recipes in it.  I hope to eventually do every single recipe (or variation) that is in the book.  Next you can see a a zip lock bag that has some ingredients. It contains some bacteria one is penicilliam and the other is Geotrichum   next I have cheese cloth and above that I have a food scale so I can see how much my cheese weighs, going right from that I have some cultures the two there are thermophyllic and proprionic gas.  Next I have a cheese board with 4 cheese knives/forks so I can make some good cheese plates.  Then in the back you have my cheese press. The press came with two cylinders.  Depending on how much cheese I am making at the time.  2 gallons of milk or 4 gallons of milk.  On either side of the press you can see some cheese mats that are good to use when drying out the cheese or when aging it in your fridge.  With these supplies I will be able to make cheeses from Brie, to Cheddar, to Parmesan.

All in all you can see I got a lot of good stuff.  I was very happy with what I got, hopefully for Christmas I will get a few more things, like maybe a cheese slicer, or a good thermometer/barometer that I can put downstairs to make sure I keep my cheese at the right temp and humidity.

Sunday, September 11, 2011

Cheesemaking Book Review: The Joy of Cheesemaking


Before I get to the review, take a look at this beautiful caprese salad that my wife arranged from some of my fresh mozzarella.  It was a really good salad and I was very happy with the mozzarella.  I made it to take to a party at a friends house and I made it very quickly will little guidance from a recipe.  I guess I have made mozzarella enough times now to know how to make it.  One nice thing is that it turned out almost as good as when I used the Snowville dairy milk.  Not sure what made it turn out good.  I did have to open a new bottle of rennett since I used up all of my first bottle. The salad is made up of tomatoes, mozzarella, basil, olive oil, salt, pepper, and some homemade balsamic syrup my wife made.


This is the 2nd book on cheesemaking I have read.  I will do a review on the first at a later date. First I will tell you what I liked about the book, then what I thought could be better.  Keep in mind I am writing this from the perspective as a relatively new cheesemaker. 

I really like the color pictures in the book.  It showed some nice pictures and had some nice stories of small operation cheesemakers.   Also at the end of the book it had some very good information regarding how to cut different shapes of cheese and how to have a balanced cheese board.  By making sure to put different types of textures, flavors, and milk on the board.  All in all I would recommend this book to people who want to learn more about cheese and how to eat it.  A good book for those who plan on buying the cheese at the store and then bringing it home and having a cheese tasting.

Now some of the things I did not like.  The recipes were really lacking for a "home" cheesemaker.  A lot of the recipes called for 5 gallons of milk.  This can be hard unless you have a big enough pot.  Even if you have a big enough pot (I do) I would not want to commit 5 gallons of milk to a cheese I had never made before.  The book goes into a lot of detail on calculations on how much culture to use and how long after you get the right PH number before you should get a clean break.  They also required some more advance equipment like a PH tester.  While this book might be good for a commercial cheesemaker I would not recommend it for someone who is new or even intermediate in the cheesemaking field. 

So if you are looking for a book to help you appreciate cheese then this might be your book but if you are looking for some guidance in your new found hobby I would not recommend this book.


Monday, September 5, 2011

Spanish Cheese, Manchego


So after making my first hard cheese, Farmhouse Cheddar, I looked for a hard cheese I could make that did not need to take very long to age.  For those who know me well, I have little patience and so it has been really hard for me not to cut open my cheddar and see how it tastes.  So I found one.  This is a Spanish Cheese and it is called Manchego.  It is traditionally made from sheep milk but I used cow since I do not have access to sheep.  I was quite excited to try it since I lived in Spain for two years and enjoyed several of the cheeses there. 

First there are several types of Manchego. There is Manchego Fresco (fresh) which can be aged anywhere from a couple of days up to 2 weeks.  Manchego Curado (Cured) aged three to six months.  And then there is Manchego Viejo (old) which is aged at least one year.

Ingredients with my ever faithful cheese journal
 So first the ingredient list
  • 2 Gallons 2% milk
  • 1 packet mesopholic starter
  • 1 packet thermophilic starter
  • 1/2 tsp calcium chloride
  • 1/2 tsp Rennett diluted in 1/4 cup water
  • 2 lbs canning salt
  • 1 gallon water

-I first added the milk and heated it to 86°F

 -After reaching this temperature I turned off the heat and put in the calcium chloride mixed it up really well and then I put in both cultures.  Then I let it set for 45 minutes off the heat (I was using a double boiler)

-Next I added the diluted rennet and stirred (checking the temperature and making sure it was staying at 86°F, when it dipped I put it back on the heat).  I then let this set, covered, for 30 minutes.
Clean break of the curds

 -After getting a clean break I cut the curds in to 1/2 inch cubes, then let it set for 5 more minutes.

 -Next came a new part for me and before I started I did not realize I had to sit there for 30 minutes stirring the curds with a whisk gently changing the 1/2 inch cubes into little rice size curds.  For me it looked a lot like cottage cheese at first.


The curds while I stirred them


The curds near the end of the 30 minutes
 -Now I heated the curds slowly to 104°F (increasing 2° every couple of minutes) stirring gently
    -then let the curds set for 5 minutes.

-I then poured off the whey (keeping it to make whey ricotta out of it) and ladled the curds into a cheesecloth lined mold.

Pouring off the whey but still capturing any curds that sneak through
The curds after pouring off most of the whey

-Next I pressed the bricks with the same crude press I used last time using 1 brick for every 5 lbs of pressure I needed
    -First 15 lbs for 15 minutes, then taking cheese out flip it over and then back into the press
    -repeat this 3 times but on the third time use 35 lbs (7 bricks) for 6 hours.

Manchego in mold after being pressed
Cheese out of mold, after being pressed

-Next I created a salt brine solution by using 2 lbs of cheese and 1 gallon of water I soaked the cheese in this brine for 6 hours at 55°F

-After the 6 hours I cut the brick of cheese in half, so that I can eat one as a Fresco and hopefully the other as a Curado

-Now I coated both bricks of cheese (I estimate that each one was around 1lb so 2 lbs in total, but I need to get a food scale soon so I will now exactly) in olive oil. 

For those who have been to Spain or know anything about them they use olive oil for everything, I was often told contradictory things that olive oil can do, for example if you have a dry scalp use olive oil, if you have dandruff use olive oil, if you want to gain weight use olive oil, if you want to lose weight use olive oil, etc...  So in my mind using the olive oil is what make it very Spanish.


Me coating the Manchego in olive oil


So that is it for this adventure, I am quite satisfied.  I did have some troubles at the beginning keeping the water at 86°F it kept wanting to be a little higher.  I will have to figure out a easy way of keeping the temperature steady.  I am really excited to try this cheese in the next few days.  We will see if I can wait till the weekend before I break into it.  Now I just need to flip it every day and rub of any mold that grows with some salt water.  Sometime soon I need to make some more cheddar because at work we will be having a chili cook-off and I want to bring my own cheese to put on top of it.
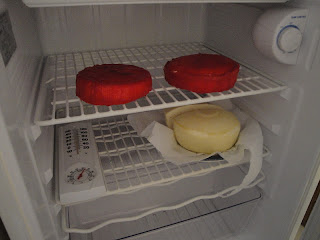
My cheese fridge in my basement.  The ones on the top row is my Farmhouse Cheddar coated in red wax and my Manchego below that coated in olive oil.


Sunday, September 4, 2011

Different Milk, Different Results

I have made homemade Mozzarella several times now, each time I have had to adapt a little from the recipe I was following because I could never get the cheese to set enough.  Some things I have had to do were letting the mozzarella set after putting in the rennett longer than the 5 minutes the recipe called for (I was letting it set for as much as 20 minutes).  I have also had to let the mozzarella drain in a hung cheesecloth.  I had to do this to get the mozzarella dry enough to handle.  After talking to the Specialty Cheese Category Manager at work he said I should try Snowville Dairy milk since it has not been homogenized.  So I decided to try it.  I had to go to a grocery store a little ways away to get it and it was $7.00 for a gallon of this milk, so a little expensive for my blood.  I thought I would try it and see if it was worth the extra money.
Ingredients used, you can see the Snowville Dairy milk
Ingredients:
  • 1 Gallon Whole Milk
  • 1 1/2 tsp citric acid diluted in 1 cup cool water
  • 1/4 tsp Rennett diluted in 1/4 cup water
  • 1 tsp salt
-First mix well the milk and citric acid in pot, heat milk mixture to 90 degrees
    -take off heat and add Rennet carefully, stirring very gently in a up and down motion.
-Let milk set 7 minutes

You can see a much better clean break from this Snowville Dairy milk

-Cut curds into 1/2 inch cubes
-Heat to 105 degrees stirring gently
    -you are suppose to do this so the cheese does not knit back together, in the past my curds were not strong enough to knit back together so I did not do it, this time however with the better milk they did knit back together, so make sure to stir gently.

-After you reach 105 degrees turn off heat and let it set for 5 minutes
-Next ladle curds with a slotted spoon into a microwave safe bowl
   -Pour off as much whey as possible, form mozzarella into a ball
-Knead curds (wear globes the cheese is hot)

Me kneading the curds, you can see all the whey leaving the curds

-Microwave for 1 minute, take out and knead cheese
-Microwave for 30 seconds (two times) each time taking out and kneading cheese
-Add salt and start the fun part of stretching the cheese like taffy.  Do this until it starts to cool and has a nice sheen, then form into a ball.

Me having fun with pulling the cheese like taffy
My Snowville Dairy homemade mozzarella ball


 My wife grabbed some tomatoes from our fridge (store bought) and we ate cheese and tomatoes, but then I went to the garden and got a fresh tomato.  You can see the difference, the garden tomato is the darker red one and it tasted so much better.

Yummy tomatoes and mozzarella, plus my wife had some pesto she had bought to go with it.
All in all it was a more successful cheese making then I have had in the past.  Using the Snowville Dairy milk that had not been homogenized really helped with getting a really good clean break, however the taste of this mozzarella was not much different then my past ones, so I do not think I will make it a habit to use this much more expensive milk.  I guess if I ever make a video on how to make home made mozzarella or was asked to teach a few people I might buy it so I can show them how it is suppose to work, but most likely I will just continue to use the cheaper milk I have found locally.

Also this weekend I made a Spanish cheese called Manchego.  I lived in Spain for 2 years so I was excited to make this cheese, also it only takes a few days to age for Manchego Fresco, but you can let it age longer for a stronger flavor, look again soon to see how that went.

Also if you like the blog please click on the "Follow" button, it nice to see who enjoys reading.

Wednesday, August 17, 2011

First Hard Cheese- Farmhouse Cheddar


After getting my cheese making in the kit from the New England Cheesemaking Supply Company I was anxious to try out a hard cheese.  The only problem is I have to be a little patient since hard cheeses take some time to age, some like Parmesan take 10 months!!!.  So for my first cheese I told Farmhouse Cheddar, mainly because I only have to let it age for 1 month.  I guess we will have to see if I can wait that long.

I first started with all the ingredients below.  The big red brick is the wax that I will melt to cover the cheese (I will blog about that later).  You can also see the mold I will be using to shape the cheese.  And then right in front of the milk in the square packet is the live culture that is the secret to getting the right taste. It is called mesophilic culture and is used for low heat cheeses.  This is all so very exciting.


Here is my ingredient list:

     2 Gallons Whole Milk
     1 packet direct-set mesophilic starter (or 4 ounces prepared mesophilic starter from New England Cheesemaking)
     1/2 teaspoon liquid rennet (or 1/2 rennet tablet) diluted in 1/4 cup unchlorinated water
     1 tablespoon cheese salt

I first put the 2 gallons into my new stainless steel pot and that into a bigger stainless steel pot with water in to create a double boiler.  I set the burner to level 2 and slowly warmed the milk up to 90 degrees.  The water on the in the outer pot was around 94 degrees. This took about 15 minutes.  I then added the culture and covered for 45 minutes.  This I was able to do by just removing it from the heat and it stayed at the 90 degrees.

After this I added the rennet and slowly stirred the diluted rennet into the milk.  I put in on the burner for a little bit to warm the water back up to 94 degrees then took it off again and let it sit for 45 more minutes.     
My double boiler

After letting the milk set for 45 minutes the curds had formed and I got a somewhat clean break.  I then had to cut the curds into 1/2 inch cubes I did this by taking a long knife and cutting the cheese one way with 1/2 inch between each cut I then rotate the pot 90 degrees and cut more lines 1/2 inch apart.  I then needed to cut he cheese underneath the surface so I just did not have very, very, very long cubes. To do this you angle the knife at a 45 degree angle and using the previous lines cut to make the 1/2 inch cubes.

Next I heated the curds slowly to 100 degrees (about 3 degrees every 5 minutes) I kept the burner between level 2 to level 3.  This is called cooking the curds, allows the whey to be released from the curds. 


At this point I scooped the cheese curds into a piece of cheese cloth and then hung it up off our cabinets for 1 hour to let all the whey drain out.
Do you like my little bungee cord
 Next you break the compressed cheese into walnut size pieces.  Here is the picture when I just started breaking up the cheese


Here is a picture after I was done breaking up the cheese.  I then added the salt and mixed it around.  At this time I could already tell it was different from the soft cheeses I have already made by just the smell of the curds.  


Since I do not have an actual press, I hope I will eventually have one, I had to make one.  I did this by putting a little custard dish upside down into a pie plate and set the mold on top of the custard dish, this allows the whey to drain without keeping the bottom of the mold wet. 


Here you can see the mold entirely filled ot the rim with the curds. You can also see the whey already begining to drain.

TO press I first needed to out 10 pounds for 10 minutes.  For my improved press I used two bricks in a big tuppaware container. Then I took the cheese out (that was lined with cheesecloth) and flipped it.  Then I had to put 20 pounds for 10 more minutes.  This took 4 brick and again flipping the cheese


After that I needed to do 50 pounds for 12 hours.  Since I was worried about the 10 bricks falling over and put my whole made up press into my big pot that kept everything from falling.


After waiting overnight this is what it looked like.

 Now I just need to wait 3-5 days as it airs out.  I also cut the block in half that way I can try one half after the required 1 month of aging, and then let the other one age longer.  Tomorrow I plan to wax the two halves and letting age downstairs in a little fridge at around 50 degrees.  Today, after it has sat for 3 days, it already has a very nice cheese aroma.


Also below you can see I was able to make a decent amount of ricotta from the left over whey.  About 2 cups.  So out of 2 Gallons of whole milk I was able to get about 2 pounds of Farmhouse Cheddar and about 2 cups of Ricotta.


 I can not wait to try my cheese it a mere 4 weeks.  Right now it is a little hard since it is in view but once it goes downstairs it will be much easier.  I plan to make real cheddar and parmeson during the month of September.  Stay tuned.


Monday, August 15, 2011

Patience is a Virtue

Cheese Glorious Cheese, What Else Could I Ask For

So since that last time I wrote I have tried making mozzarella several times.  Each time it seemed to fail.  The curds never got firm and when I put it in the microwave it would come out way to runny.  The first time I thought it was because I had used to little rennet, since my wife had said the last mozzarella was too firm, the next time I thought it was because I used the wrong brand of milk, the third time it was a different brand of milk.  Finally I decided it was because my wife was not in the room with me.  When I made the mozzarella from the previous post she was there telling me to be patient, let the curds set a little longer, let the whey drain a little more.  Well she told me the same things again.  After scooping out the curds I again felt that the cheese was to runny and I was about to give up, but she kept telling me to be patient, to endure to the end, and so I did.  And I got some good cheese out of it.  Here are some pictures from the successful cheese making.

 
After cutting the curds into 1/2 inch cubes

Draining the whey out of the cheese, this is the part
that my wife had to tell me to be patient, I thought it was all wrong

This is me kneading the cheese, I wear the rubber gloves to
protect my hands from the cheese, its about 130 degrees

The fun part, pulling the cheese like taffy

Pulling the mozzarella into a ball

the ball of mozzarella


So as you can see it pays to have your wife tell you what to do.  Had it just been me in the kitchen I would have given up, I still think that the first time I got it to work, the curds were a little firmer.  But don't tell my wife I think that I am right. 

We ended up snacking on most of the cheese but last night I made manicotti.  The recipe I used called for three cheeses and guess what? Two of the cheeses I used were homemade cheeses.  The Ricotta and the Mozzarella.  I only had to use store bought Parmesan.  Next year I hope to be able to make manicotti and use ONLY homemade cheese.


Also this past week in the mail I got this little package.  YIPPEE.  It is from the Queen of Cheese (you can access her website from a link on the right).  The kit came with some cultures so I can make some different cheeses, some molds, some cheese wax, and a few other things I will need.  I was really excited.


Check out my post that is comming in the next few days to see my first attempt at making a hard cheese, a Farmhouse Cheddar in fact.

Sunday, August 7, 2011

3rd Time is The Charm-Mozarrella


Last Sunday, after running to the store Saturday night to get more whole milk from a local dairy and not Kroger, I made some more mozzarella. 

The ingredients I used are as follows:
  • 1 Gallon Trauth Farms Dairy Whole Milk
  • 1 1/2 tsp Citric Acid diluted in 1 Cup cool water
  • 1/4 tsp Rennet diluted in 1/4 cup cool water
  • 1 tsp canning salt

I first heated the citric acid and 1 gallon milk to 90 degrees  (this took about 15 minutes), I then took the milk off the burner and I gently stirred in the diluted rennet. 

After this I covered the warm milk and let it sit for about 10 minutes.  The curds and the whey separated much more than the last time I did this.  At this point I was able to make a clean break.  I then cut the curds into about 1 inch cubes with a long knife.

Next I heated the curds to 105 degrees while gently stirring every once in awhile.  Once it reached 105 I took it off the burner and began scooping the thick curds out with a slotted spoon into a colander.  Using my rubber gloves I drained as much whey out as possible before putting it into a microwave safe glass bowl.  Jenelle was amazed of how the curds kept leaking whey.

I then put it into the microwave for 1 minute taking it out and kneading the cheese.  I then nuked it for 35 seconds and kneaded again (I did this step a total of three times).  Draining the whey each time.

The next part was fun, I started stretching the cheese like taffy, it was really stretchy as you can see.  At this time I also added the salt.  After stretching it till it got a little shiny I made the mozzarella into a little ball.

It tasted really good, though Jenelle thought it was too firm for Fresh Mozzarella..  Here is a picture of the final product.


I tried to make some ricotta from the whey but I got some much curds for the mozzarella that there really was not much left for ricotta.

We ate the cheese with some tomatoes and also used it on some pizza later in the week (see below)


I will hopefully be ordering some cultures soon so I can start making different cheeses, the only problem is that I will not know if I was successful until months later after I have let the cheese age.