Showing posts with label Jarlsberg. Show all posts

Sunday, May 27, 2012

Another Jarlsberg


So I made another Jarlsberg out of 3 gallons of milk.  I made one a few months ago which I now realize I never blogged about.  I thought the last one tasted good and hope this one does too.  I am however, having a hard time getting the more rounded shape of a Jarlsberg and I will have to wait and see if this one has the characteristic large eyes (holes).


The ingredients I used: 
  • 3 gallons whole milk
  • 1 1/2 packets thermophilic starter
  • 1/4 tsp propionic powder
  • 3/4 tsp calcium chloride in 1/4 cup water
  • 3/4 rennett tablet in 1/4 cup water
  • salt
I first heated the milk to 92°F.  Then added the culture and the propionic powder, after letting it sit for 5 minutes I mixed the milk well with a whisk.

I then turned off the heat, covered the pot and let sit for 45 minutes.

Next I added the calcium chloride whisking it into the milk and then the rennet.  Maintaining the milk at 92°F I again let it sit for 45 minutes.

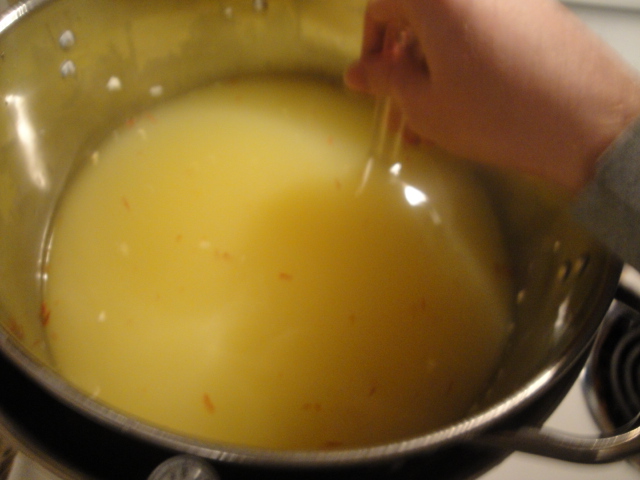
At this point I got a clean break


After the clean break I cut the curds into 1/2 inch pieces and stirred for 20 minutes with a spatula.  And then allowed the curds to settle into the bottom of the pot for 5 minutes.


I then heated some water to 140°F in a separate pot and removed the whey to the tip of the curds


Next I added about 2 cups of the 140°F water into the curds to bring the curd mixture to 100°F.


Then over the stovetop I heated the curds to 108°F over 30 minutes while stirring the whole time, once you get to the correct temperature I let it sit for 20 minutes.

I next ladled the curds into a damp muslin cloth and let drain for 5 minutes through a colander.


Then I put the curds into my mold and pressed the curds at 10 lbs for 30 minutes then flip and 15 lbs for 8 hrs.  After which I put the cheese into a salt water brine for 8 hours.


Now it is sitting in my cheese fridge for aging until my parents get here at the beginning of July.  The cheese looks a lot better then the other two times I have made Jarlsberg.  Lets all hope I get some eye formation. 

Look for a blog around the 4th of July, where I will report on this cheese as well as the Manchego.


Thursday, January 5, 2012

A Cheesemaking Christmas


I had a week off from work between Christmas and New Years, and when I wasn't out doing things with the family and mother-in-law (who was visiting from California), I was making cheese.  I made 4 types of cheeses during the week.  All the cheese's I made were ones I had made before but I have been trying to make at least each cheeses twice to make sure I am getting the hang of it.  The cheeses I made was Mozzarella, Farmhouse Cheddar, Jarlseberg, and a Saffron infused Manchego.  Also in the past month I made some Brie and some Cheese Curds but I will blog on those later.


The first cheese that I made was a farmhouse cheddar.  For Christmas I sent my dad a fake order form where he could order a cheese from me.  The cheese he picked was the Farmhouse cheddar, he likes cheddar and he picked this one since it has a short agin period so he could try it sooner.  For this recipe I followed a great book  " Artisan Cheese Making at Home" by Mary Karlin and you can see my previous attempt at this cheese here.

So the ingredients you I used:
  • 2 Gallons Milk
  • 1/2 tsp Mesophillic Culture
  • 1/2 calcium chloride diluted in 1/4 cool water
  • 1/2 tsp rennett in 1/4 cup cool water
  • Kosher Salt
for this recipe you can also see I did not have liquid annatto so I tried to used some achiote powder which comes from annatto but as you can see it did not work.

Following are some typical pictures of heating the milk, then cutting the curds in order to drain more whey out of them


The book said the curds should be done when you can take a group of them in your hands and put soem pressure on tehm and form a solid mass that can easily be pushed back apart.  As you can see it was able to do that.


After draining the whey from the curds I started pressing them.  I like the press I have but as you can see it is a little hard to know how much weight I am using since the only way you can judge the weight is by seeing how much you have compressed the spring.  So I decided to try using some household items the gave me the proper weight.

+


This is the cheese after I pressed it, next I waxed my cheese.


Here is a picture of the final cheese, I will give an update when I cut into the cheese.  I will cut it in half and send it to my dad (he only gets 1lb) I will keep the rest.  It was age down in my cheese fridge for 1 month then it will get sent out, I am excited to try this cheese and hopefully my dad will like it.


Next I made a Jarlsberg, the same recipe I used here, the difference is I made my first cheese with 3 gallons of milk.  It doesn't take any more time to make a 5 lb cheese then it does a 2 lb cheese, but I can only fit 3 gallons of milk in my pots.  I for some reason did not take many pictures of this cheese but when I take it out of the fridge to move to a 65 degree enviorment I will take a picture of it.

Here are the pictures I did take, one thing that I followed different then last recipe was I ran out of calcium chloride and did not have time to get any more, plus I did not wax this Jarlsberg in hope I will have a little more eyelet movement.


I am also excited to try this cheese in 2 months.  Hopefully it will have a little better shape and eyelet formation.  I will post an update when I am done tell you how it tastes.  I am really looking foward to having some Grilled Cheese Sandwhich with this cheese.


So the last cheese I made was Saffron infused Manchego and I found the recipe from the same "Artisan Cheese Making at Home".  I lived in Spain for two years and had always enjoyed cooking with saffron.  I would make Paella with it but I think was a lot cheaper and easier to find in Spain.  So to find it I went to a store in Northern Cincinnati called Jungle Jims which is a really great store and has almost any food you could imagine, from a lot a different countries.

Here is a picture of the saffron, this little container cost $10

I followed basically the same recipe I did before except for adding the saffron, you can go here to find my other Manchego.  One reminder is this isn't technically Manchego because it is made with cows milk and not Sheep milk.  The paprika I will use with some olive oil when it's aged a little while.


Here you can see the saffron start to color the milk a little bit.


This is the cheese before I put it in a water bath.  After aging a few days it has turned even more orangish.

So there you have it, my cheese adventure over Christmas.  I was quite happy that I made three different cheese in one week.  And that not even including the Mozzarella and Ricotta I made while my mother-in-law was visiting.  I was really excited because she has been the first person I have shown to make Mozzarella.  Here is a picture of their first mozzarella.


So now I have 4 cheeses in my fridge that are being aged.  These three I just talked about and the Parm I started several months agon (only 4 months left before I get to try it).  I will take a picture of my little fridge sometime to show all the cheeses.  I will be able to try the Manchego first in one more week.  Hopefully some of you who read this blog will get to try some of the cheese I send to Utah for my dad. 


Tuesday, December 6, 2011

Jarlsberg, Parmesan, and Brie Oh MY!!!

My Jarlsberg after 2 months
So I have been busy with making several cheeses and can now start blogging about them.  The following three cheeses were made from recipes (with some small changes)  from a great book called "Artisan Cheese Making at Home" and also from recipes on New England Cheesemaking website.

Parmesan

First lets start with the Parmesan. It is going to take 9 months to age before we can eat it.
The ingredients I used are as follows:
  • 2 gallons milk (Whole, 2%)
  • A packet of Thermophilic starter
  • 1/2 tsp calcium chloride in 1/4 cup cool water
  • 1/2 tsp liquid rennet in 1/4 cool water
Instructions:
  • Heat milk over low heat (double boiler) to 94ºF
  • Sprinkle thermo B over milk and mix well with whisk
  • add calcium chloride and rennet, gently whisk for 1 minute
    • let set for 45 minutes at 94ºF (until a clean break)
  • Now whisk curds gently to cut curds into pea size pieces
    • let set for 10 minutes
    • slowly raise temp to 124ºF over 1 hour
  • Let set at 124ºF for 10 minutes


looks like cottage cheese after the curds are drained

  • Drain curds in muslin cloth for 5 minutes
  • Put into mold and let drain another 5 minutes
    • Apply 10 lbs for 30 minutes then flip
    • Apply 10 lbs for 1 hour then flip
    • Apply 20 lbs for 12 hours  
Using my press for the very first time
  • I then prepared a salt brine and soaked the cheese at 52ºF for 12 hours (the cheese weighed 1 lb and 12 ounces before brinning)

  • After brinning I dried the cheese with a cheesecloth and let air dry for 3 days
Now it is aging in my cheese cave at 50º, where I first flipped it every day for about two weeks and am now just flipping it every week or so.  I have also rubbed olive oil on it now to help keep the cheese from drying out.  This cheese has been hard trying to keep the mold off, I think one reason is because I do not have very much air flow, so I should get a fan.  Also I was aging the brie (which will be discussed lower down).
My cheese after brinning
my cheese right now after being aged and rubbed with olive oil
Jarlsberg

Jarlsberg cheese is a Norwegian cheese that is part of the Emmental Swiss family, so you can expect the cheese to have the trademark eyelets that make it "wholly cheese".

The ingredients are as follows:
  • 2 Gallons Milk
  • 1.2 tsp Thermophilic C
  • 1/8 tsp propionic bacteria
  • 1/2 tsp calcium chloride in 1/4 cup water
  • 1/2 tsp rennet diluted in 1/4 cup water

The process I followed was:
  • Heat milk to 92ºF in a warm water bath
  • Mix in the propionic then let set for 45 minutes
  • Add calcium chloride and rennet using a whisk gently
    • let set at 92ºF for 45 minutes (until a clean break) 

  • Cut curds into 1/4 inch cubes and stir for 20 minutes
  • Heat 3 cups of water to 140ºF
  • Ladle out enough whey to expose the tops of the curds
    • Add the heated water to bring the temperature of the curds to 100ºF
  • Over low heat raise the temperature to 108ºF over 30 minutes while gently stirring
    • after reaching 108ºF let curds settle and sit for 20 minutes 

  •  Drain curds in a cheesecloth
  •  Press curds in a mold
    • 10 lbs for 30 minutes and flip
    • 15 lbs for 8 hours
  • Brine in a salt water bath for 12 hours at 50ºF to 55ºF
  • Air dry for two days
  • Coat in cheese wax
  • Age at 50ºF for 2 weeks flipping daily
  • Then age at 65ºF for 4-6 more weeks

I have enjoyed eating this cheese, though it does not quite taste like the Jarlsberg I have bought in the store.  It is almost gone, but before it is I need to make sure and make a Jarlsberg Grilled Cheese Sandwich.  When I do, I will have to tell you how it tastes.

American Style Brie

Now Brie is the most advanced cheese I have made to date.  It made me really nervous to make a cheese where you actually want to encourage mold growth.  Usually when you see mold you just wipe it off, but with Brie you want the white mold to grow, in face if you have ever had Brie and have eaten the somewhat hard bitter brine, that is the mold.  So I guess we will have to wait till around Christmas to see if I was successful on my first Brie.

Ingredients:
  • 2 gallon whole milk
  • 1/2 cup heavy cream
  • pinch of mesophillic direct set starter
  • 1/4 tsp thermophilic starter
  • 1/8 tsp Penicillium candidum
  • 1/8 tsp Geotrichum candidum
  • 1/4 tsp calcium chloride in 1/4 cup water
  • 1/4 tsp rennet in 1/4 cup water

the powder is the mold
What I did:
  • Heat milk to 90ºF
    • Mix in both starters (meso and thermo) and both of the white molds (penicillium and geotrichum)
  • raise temperature to 96ºF
    • turn off heat and let set for 90 minutes
  • mix in the calcium chloride and rennet then whisk gently
    • let set for 30 minutes or until a clean break
  • Cut curds into 3/4 inch cubes
    • stir curds gently for 10-150 minutes
    • let set for 5 minutes then ladle out whey to expose curds
  •  Gently ladle the curds into a mold (I have my wooden cutting board underneath to assist in flipping the cheese because you have to be careful not to break the cheese as you flip it.
  • Let curds drain for 1 hour
  • flip and drain for 1 more hour
  • leave brie at room temperature for 8 hours


I had so much curds I used both my molds, so I have one big brie and one mini brie aging right now

after 1 flip

before aging in cheese cave
  •  Salt each side of the cheese lightly
  • Age at 54ºF at 80% humidity for 12 days, flipping once halfway
  • I have the cheese in some Tupperware containers that I can close. I have put some damp paper towels in the boxes to keep the humidity high
  • They are now sitting in my refrigerator at 38ºF
    • Let age for 5-6 weeks
cheese before aging

you can start seeing the mold growth on the side
I am excited to see how the Brie turns out.  We will try to eat around Christmas.  Hopefully it does not kill us because I plan to take the small brie into work for my coworkers to try.  I will keep you posted in the progress of the brie. 

Also I plan to make cheese curds soon, hopefully this coming weekend.