Sunday, May 27, 2012

Another Jarlsberg


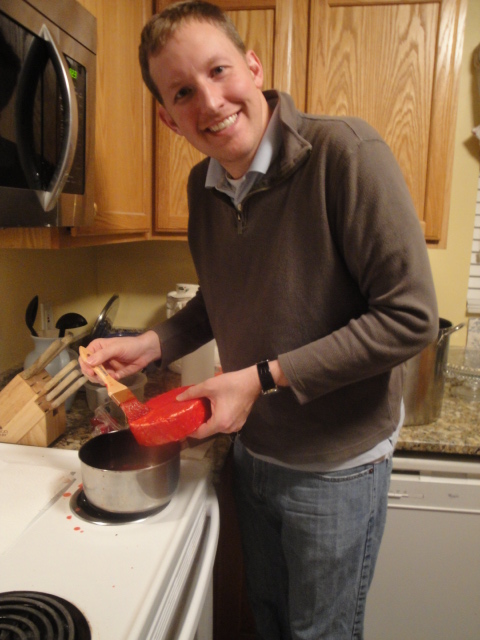
So I made another Jarlsberg out of 3 gallons of milk.  I made one a few months ago which I now realize I never blogged about.  I thought the last one tasted good and hope this one does too.  I am however, having a hard time getting the more rounded shape of a Jarlsberg and I will have to wait and see if this one has the characteristic large eyes (holes).


The ingredients I used: 
  • 3 gallons whole milk
  • 1 1/2 packets thermophilic starter
  • 1/4 tsp propionic powder
  • 3/4 tsp calcium chloride in 1/4 cup water
  • 3/4 rennett tablet in 1/4 cup water
  • salt
I first heated the milk to 92°F.  Then added the culture and the propionic powder, after letting it sit for 5 minutes I mixed the milk well with a whisk.

I then turned off the heat, covered the pot and let sit for 45 minutes.

Next I added the calcium chloride whisking it into the milk and then the rennet.  Maintaining the milk at 92°F I again let it sit for 45 minutes.

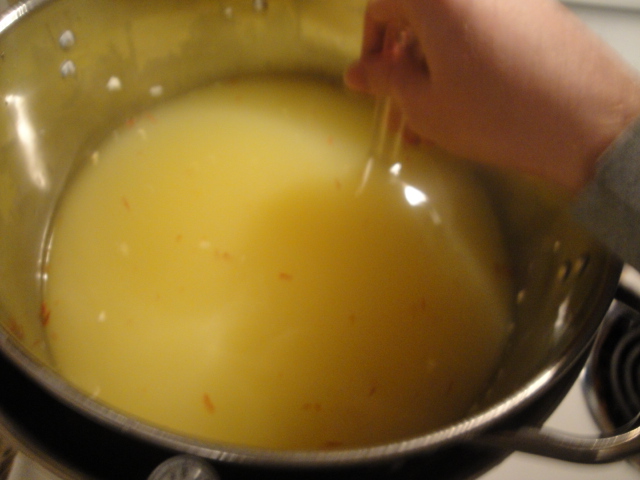
At this point I got a clean break


After the clean break I cut the curds into 1/2 inch pieces and stirred for 20 minutes with a spatula.  And then allowed the curds to settle into the bottom of the pot for 5 minutes.


I then heated some water to 140°F in a separate pot and removed the whey to the tip of the curds


Next I added about 2 cups of the 140°F water into the curds to bring the curd mixture to 100°F.


Then over the stovetop I heated the curds to 108°F over 30 minutes while stirring the whole time, once you get to the correct temperature I let it sit for 20 minutes.

I next ladled the curds into a damp muslin cloth and let drain for 5 minutes through a colander.


Then I put the curds into my mold and pressed the curds at 10 lbs for 30 minutes then flip and 15 lbs for 8 hrs.  After which I put the cheese into a salt water brine for 8 hours.


Now it is sitting in my cheese fridge for aging until my parents get here at the beginning of July.  The cheese looks a lot better then the other two times I have made Jarlsberg.  Lets all hope I get some eye formation. 

Look for a blog around the 4th of July, where I will report on this cheese as well as the Manchego.


Sunday, May 13, 2012

 Saffron Manchego


So my parents are travelling to visit us from Utah the beginning of July and so I have been busy trying to make several different cheeses for them to taste.  Recently I have made Brie, English Cheddar, Jarlseberg and Manchego. Most of these cheeses that I have made before but am hoping to perfect a little bit.  Today I will blog about the Manchego, lets hope that I am diligent this week and blog about the rest of them.  With the Manchego I used:
  • 2 gallons whole milk
  • 1/4 tsp buttermilk culture (normally it calls for mesophyllic but thought I would try something new)
  • 1/4 tsp thermophillic culture
  • saffron threads (I diffused them in water over the stove top first)
  • 1/4 tsp lipase powder in 1/4 cup water
  • 1/4 tsp calcium chloride in 1/4 cup water
  • 1/2 rennet tablet in 1/4 cup water
  • olive oil
  • paprika


First I heated the milk to 86°F then turned off heat and added both cultures (waiting 5 minutes) and stirred with a whisk.  Letting it next set for 45 minutes.

Next I added the lipase, gently stirring it, and then the calcium chloride and the rennet.  Then I let it sit for 30 minutes, at which point I got a clean break.


After the clean break I cut the curds into 1/2 inch pieces, waiting 5 minutes and then stirred it with a spatula for 30 minutes allowing the whey to drain as well as the curds to firm up.

I then slowly heated the curds to 104°F (over about 45 minutes) then let it sit for about 5 minutes. 

I then let lined a colander with damp butter muslin and ladled the curds into the muslin, allowing the curds to drain for 15 minutes.

Next I put into my cheese press.  As you can see below I have changed my cheese press a little bit.  I had a hard time guessing on the weight when I was using a spring.  So know I am just using some weights.  It took a little bit of taking apart my press so that it could work.


After pressing it for over 8 hrs at 30 lbs I put it into a salt water bath for 8 hours.  


It is now aging in my cheese fridge until my parents come in July (aging will be about 2 months total).  As I have mentioned in my other posts on Manchego you can eat it in as little as 10 days or can go much longer, just depends on how you want it to taste.  When it is does aging I am going to try and rub it with smoked paprika and olive oil.


Sunday, March 18, 2012

Soft Cheese Fun


I have used Ricki's book before but I had just borrowed from the library and not been able to dig into it.  This past month my wife got it for me and I was very happy.  I have decided to try and make as many recipes from it as possible over the next year.   The best thing is that you all get to accompany on on these fun cheeses.
Last week I made two cheeses with recipes basically found in "Home Cheese Making" by Ricki Carroll.  I have not ordered my new supplies yet so I found two I could do with the ingredients I had.  I choose to make a cheese called Lactic Cheese and some Cottage Cheese.


The first recipe in Ricki's book is Lactic Cheese.  It tasted very close to a cream cheese to me and tasted good on some bagels.  It made a lot of cheese.  1 gallon of milk made a little over 2 lbs of cheese.  I have to come up a with a few recipes this week to use all the cream cheese in.

I used:
    1 gallon of whole milk
    1 packet of mesophillic culture
    4 drops from rennet dissolved in 1/3 cups water

I first started by heating my 1 gallon of milk and the mesophillic starter to 86ºF
Then I added 1 tsp of the diluted rennet mixture and gently stirred.

   
I then let it sit in the pot with the burner turned off overnight, approximately 12 hours.


Overnight the milk had turned into a very loose yogurt like substance.  I then poured the mixture into a muslin lined colander.  As you can see I barely had enough room, this recipe made so much more then I expected since most of the cheeses I make follow a 2 gallon = 1 lb instead of the 1 gallon = 2 lbs this had.


I then left the bag to drain for about 12 more hours (while I was at work).  I drained a lot of whey during this time.


After draining I flipped the muslin inside out into a bowl.  At this point I just added some salt.  You can ad a lot more types of ingredients but being my first time I did just salt and have used it mainly on bagels in the morning.  It has a great taste with just the right amount of tanginess.  I believe I will make this again when I have family visiting since it is a cheese you can see the fruits of your labor quite quickly.


Since this cheese was so easy in the process I made a 2nd cheese at the same time. So I made homemade small-curd cottage cheese.


This cheese does not even use rennet.  I guess that is why it takes so long for the curds to form.  The ingredients I used for this cheese was"
    - 1 gallon 2% milk
    - 1 packet mesophillic starter
    - 3 tbl cream

I first heated the milk to 72ºF and then added the mesophillic starter, mixing thoroughly.


I then let it sit overnight and most of the next day, about 24 hours at room temperature. I then cut the curds into 1/4 inch cubes and raised the temperature to 100ºF over about 15 minutes and then let it remain there for about 10 minutes while stirring occasionally.  I then raised temp to 112ºF over another 15 minutes and leave it at that temp for 30 minutes.  The process is cooking the curds I had which were very weak and soft and making them more firm.  After the curds were firm enough I let them sit for 5 minutes.  


I then poured off the whey into a cheesecloth lined colander.  Picture below is not very good of the curds hanging to dry.


Here is a another picture of the curds hanging to drain more whey out.  I let it drain for about 10 minutes. 

I then dipped the curds into cold water for 5 minutes.  Next untie the bag and break up the curds into small pieces and add salt.  This tasted okay but not as good as the lactic cheese.  It was a little more sour then I liked and I did not get the creamy mixture you usually get when eating cottage cheese. I may just need to add some plain milk next time after it is all done to get that mixture.  This made a little over 1 lb of cheese.


On too my next part of this blog which will be shorter since I had no pictures.  About a month ago we had some family friends over to make cheese.  The friend was actually in the cheese making class with me that started this whole thing.  But since then they had moved and been to busy to get too much into the cheese making.  This friend is also hopefully getting a goat here in the spring which will be lots of fun once I can get some milk from it.

We made mozzarella together but also for him to see some of the process of a hard cheese is made.  So before they came over I started the process of making a Colby.  Which was a brand new cheese for me.  The part was fun, we made two mozzarella, one for me and one for his family.  They both turned out really good.  However the Colby did not turn out too great.  It is really salty and has a bland flavor.  I thing the reason is because I was trying to use a different mold to get the classic shape of a Colby but it was to small so I had to make another one with my other mold.  This equated into 2 -1 lb bricks of cheese that I put into a salt bath that was meant for a 2 lb brick of cheese.  With more surface area I think the salt was able to penetrate the cheese too much.  Here is a picture of the finished cheese after it was waxed and aged.

I hope to try doing Colby again in about two weeks.  Wish me luck. I also hope to try Brie again as well as make two more recipes from the first part of Ricki's book.  Maybe Fromage Blanc, Mascarpone, Gervais, English cheddar, or other.  Leave a comment and tell me which ones you think I should make.

Thursday, January 5, 2012

A Cheesemaking Christmas


I had a week off from work between Christmas and New Years, and when I wasn't out doing things with the family and mother-in-law (who was visiting from California), I was making cheese.  I made 4 types of cheeses during the week.  All the cheese's I made were ones I had made before but I have been trying to make at least each cheeses twice to make sure I am getting the hang of it.  The cheeses I made was Mozzarella, Farmhouse Cheddar, Jarlseberg, and a Saffron infused Manchego.  Also in the past month I made some Brie and some Cheese Curds but I will blog on those later.


The first cheese that I made was a farmhouse cheddar.  For Christmas I sent my dad a fake order form where he could order a cheese from me.  The cheese he picked was the Farmhouse cheddar, he likes cheddar and he picked this one since it has a short agin period so he could try it sooner.  For this recipe I followed a great book  " Artisan Cheese Making at Home" by Mary Karlin and you can see my previous attempt at this cheese here.

So the ingredients you I used:
  • 2 Gallons Milk
  • 1/2 tsp Mesophillic Culture
  • 1/2 calcium chloride diluted in 1/4 cool water
  • 1/2 tsp rennett in 1/4 cup cool water
  • Kosher Salt
for this recipe you can also see I did not have liquid annatto so I tried to used some achiote powder which comes from annatto but as you can see it did not work.

Following are some typical pictures of heating the milk, then cutting the curds in order to drain more whey out of them


The book said the curds should be done when you can take a group of them in your hands and put soem pressure on tehm and form a solid mass that can easily be pushed back apart.  As you can see it was able to do that.


After draining the whey from the curds I started pressing them.  I like the press I have but as you can see it is a little hard to know how much weight I am using since the only way you can judge the weight is by seeing how much you have compressed the spring.  So I decided to try using some household items the gave me the proper weight.

+


This is the cheese after I pressed it, next I waxed my cheese.


Here is a picture of the final cheese, I will give an update when I cut into the cheese.  I will cut it in half and send it to my dad (he only gets 1lb) I will keep the rest.  It was age down in my cheese fridge for 1 month then it will get sent out, I am excited to try this cheese and hopefully my dad will like it.


Next I made a Jarlsberg, the same recipe I used here, the difference is I made my first cheese with 3 gallons of milk.  It doesn't take any more time to make a 5 lb cheese then it does a 2 lb cheese, but I can only fit 3 gallons of milk in my pots.  I for some reason did not take many pictures of this cheese but when I take it out of the fridge to move to a 65 degree enviorment I will take a picture of it.

Here are the pictures I did take, one thing that I followed different then last recipe was I ran out of calcium chloride and did not have time to get any more, plus I did not wax this Jarlsberg in hope I will have a little more eyelet movement.


I am also excited to try this cheese in 2 months.  Hopefully it will have a little better shape and eyelet formation.  I will post an update when I am done tell you how it tastes.  I am really looking foward to having some Grilled Cheese Sandwhich with this cheese.


So the last cheese I made was Saffron infused Manchego and I found the recipe from the same "Artisan Cheese Making at Home".  I lived in Spain for two years and had always enjoyed cooking with saffron.  I would make Paella with it but I think was a lot cheaper and easier to find in Spain.  So to find it I went to a store in Northern Cincinnati called Jungle Jims which is a really great store and has almost any food you could imagine, from a lot a different countries.

Here is a picture of the saffron, this little container cost $10

I followed basically the same recipe I did before except for adding the saffron, you can go here to find my other Manchego.  One reminder is this isn't technically Manchego because it is made with cows milk and not Sheep milk.  The paprika I will use with some olive oil when it's aged a little while.


Here you can see the saffron start to color the milk a little bit.


This is the cheese before I put it in a water bath.  After aging a few days it has turned even more orangish.

So there you have it, my cheese adventure over Christmas.  I was quite happy that I made three different cheese in one week.  And that not even including the Mozzarella and Ricotta I made while my mother-in-law was visiting.  I was really excited because she has been the first person I have shown to make Mozzarella.  Here is a picture of their first mozzarella.


So now I have 4 cheeses in my fridge that are being aged.  These three I just talked about and the Parm I started several months agon (only 4 months left before I get to try it).  I will take a picture of my little fridge sometime to show all the cheeses.  I will be able to try the Manchego first in one more week.  Hopefully some of you who read this blog will get to try some of the cheese I send to Utah for my dad.